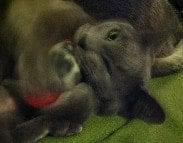
Cats love catnip. It’s lots of fun to watch them play with catnip toys. This mouse pattern is simple to make with small scraps of sturdy fabric, cotton stuffing, dried catnip, and a piece of leftover ribbon. Sew away, then let your cat go crazy with the results.
Making a Catnip Mouse
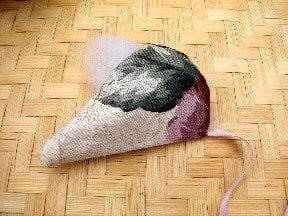
 Catnip mice are basically little pillows cut from heart-shaped patterns and stuffed with catnip. Pick sturdy fabric for your mouse like polar fleece, thick cotton, corduroy, or flannel. Cats are color blind so the color choice is entirely up you. Your cat will only see the design. I don’t sew eyes on my catnip mice because I’m afraid my kitties will rip them off and choke on them. I also don’t like to make my mice the same color as real mice so it’s clear to visitors the little critter that my cat is running around with is just a toy.
Dried catnip is easy to get at pet stores and herb shops. Organic catnip smells a lot stronger than non-organic catnip. The scent is from the essential oil the plant makes to protect itself. This scent is what cats love; it stimulates and excites them. Catnip has the opposite effect on people. A cup of catnip tea is very soothing and makes many people a little sleepy.
Equipment:
- Sewing Scissors
- Funnel
- 1 Chopstick
- 1 Sewing Needle
- Sewing Pins (optional)
- A copy of the provided pattern (optional)
Materials:
- 1 square of sturdy fabric 6 inches in length
- Thread
- 1 piece of ribbon 8 inches in length
- 1 handful of cotton stuffing
- 1/4 cup of dried catnip leaves
- 1 small piece of felt
Procedure:
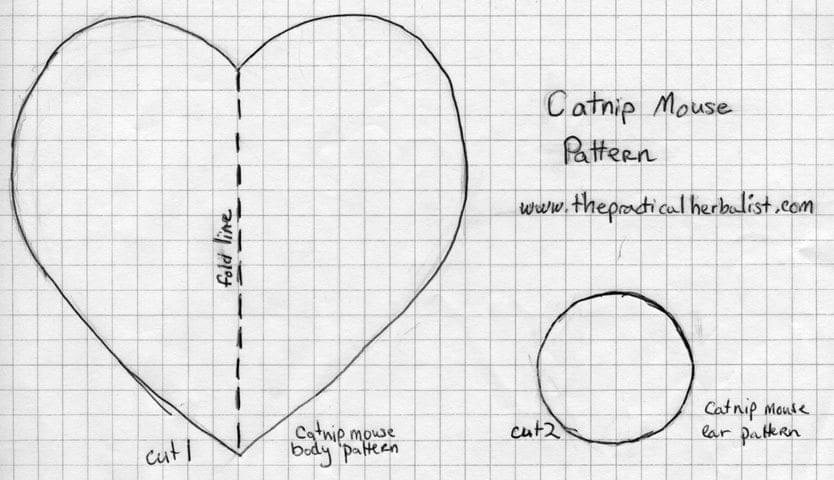
1.Fold the fabric square in half and, using the sewing scissors, cut a half-heart shape on the fold so when you open the fabric, it will look like a whole heart shape. If you’re planning on making lots of catnip mice, trace a pattern of the heart shape you like on paper to make duplicating your shape easier or use the pattern provided here.
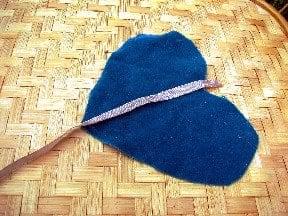
2.Cut the ribbon so it’s at least twice the length of your fabric heart. Lay the ribbon inside the heart with a small edge of it sticking out of the dip between the upper mounds of the heart as shown.

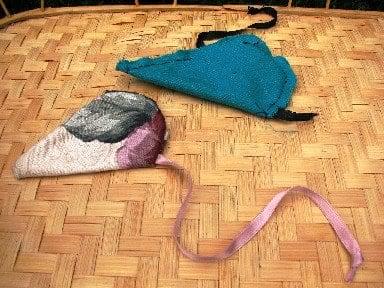
3.Fold your fabric heart in half again with the longest piece of the tail sticking out of what will become the mouses nose and the stub of the tail sticking out of the place where mice usually grow their tails. This seems strange now but you’ll later turn your mouse inside out and the tail will be in the right spot when you’re done.
4.Thread the sewing needle and tie a knot in the end so your stitches don’t slip out.
5.Using sewing pins, secure your mouse parts in place or just hold the mouse parts in place with your fingers.
6.Sew a neat, tight line of stitches along what will be the back part of the catnip mouse starting with the tail until you get to the top of what will be the mouse’s back. Small stitches will hold the tail in place and keep the stuffing in while the cat plays with your creation. The better your stitching, the longer your toy will last.
7.Move the long part of the tail from the nose to the top of the back. The tail will stick out the hole at the back of the mouse. This is the hole you’ll use to stuff your mouse.
8.Sew a neat, tight line of stitches along what will be the front part of the catnip mouse starting with the nose until you get to the top of what will be the mouse’s back and then tie another knot. Remember to leave a hole at the top big enough to fit two of your fingers.
9.Carefully turn your mouse inside out. The tail will be in the tail spot now.
10Tie a knot at the end of the mouse’s tail to keep it from being unraveled by your cat.
11.Grab a little cotton stuffing and push it through the hole at the top of the mouse’s back to pad the mouse’s backend. Then do the same for the mouse’s nose.
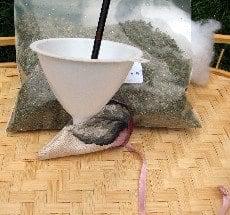
12.Put the funnel into the hole at the top o the mouse’s back and carefully pour the catnip into the mouse using the chopstick to unclog the funnel and to tap the catnip into place inside the mouse’s body.
13.Use more cotton stuffing to the fill any empty spaces in the mouse’s body and give your kitty something to really chew on when the toy is done.
14.Tuck in the edges of the fabric so they are in an even line with the finished parts of your mouse.
15.Sew the open fabric tightly together and tie a knot.
16.Cut 2 circles in the felt for the mouse’s ears. You may use the pattern provided for the circles.
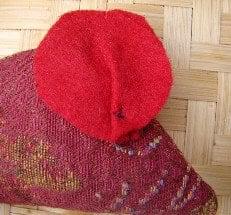
17.Using more knotted thread on your needle, sew the ears onto either side of the mouse’s head. Either sew them on flat or crimp a little fold in the circle so that it looks more like an ear. You can stick the needle through the fabric and the stuffing to secure the ears. Some cats can be rough with their toys so sew the ears on well.
18.Check your mouse for hidden holes and stitch them closed to keep the catnip from leaking out. Your mouse is done! Now it’s time to find your cat.
Note: After you clean up, remember to store your extra catnip in a spot where your cat can’t accidentally find it. Try a shelf or a cupboard your cats can’t reach.